A complete step-by-step guide to removing, cleaning, and reinstalling an Emmons push-pull changer.
Introduction
The purpose of this guide is to enable any person who has some basic tools, supplies, and mechanical aptitude to take a properly set-up Emmons push-pull steel guitar and remove the changer for cleaning and servicing and then fully reassemble the guitar. This guide will use an SD-10 as an example, but the overall process should generally apply to a C6th neck as well.
Disclaimer and Request for Feedback
This guide documents one possible way to get through this process. No doubt, there are other ways that one could go about this project. This is simply what worked for me when I did it. With that in mind, if you have suggestions for improving this guide, please share them with me on the contact page.
The Overall Process
The process for this project can be summarized in the following steps:
- Gather the necessary tools and supplies and prepare a good workspace with decent lighting.
- Disconnect the pull rods, push rods, and return springs.
- Remove the changer from the body and disassemble it.
- Clean and service all parts of the changer.
- Reassemble the changer and install it back into the guitar.
- Tune the changer.
- Reconnect the return springs, push rods, and pull rods.
- Check and fine-tune the guitar setup.
Tools and Supplies
Here is a list of the essential tools and supplies you will need to follow this guide:
- Guitar stand placed in a well-lit workspace
- #2 Philips head screwdriver
- Small flathead screwdriver
- Needle-nose pliers, assorted styles (see picture below)
- 7/64” hex wrench with long handle (for reaching the changer underside)
- 7/64” hex wrench with a short handle (for tuning)
- 5/64” hex wrench
- Shop rags, paper towels, a toothbrush and Q-tips
- Painter’s tape
- Sharpie or pen
- Fingernail polish (preferably a fast-drying kind)
- Thread locker (or fingernail polish)
- Small ruler
- Work gloves
- A couple feet of nylon string
- WD-40 (for cleaning parts, not for lubrication)
- Chem-Dip Carb Cleaner
- ??? Grit Sandpaper
- 0000 Steel Wool
- Slick 50 Classic Formula Engine Treatment
- Valvoline Moly-Fortified Gray Grease
- Liquid Wrench Penetrating Oil (only if needed if pillow blocks are stuck)
- Aluminum Polish (only needed if you want to buff aluminum parts)
- 3/8″ Heat-shrink tubing (optional)

Above: Well-lit workspace with plenty of room to work and a sturdy guitar stand.
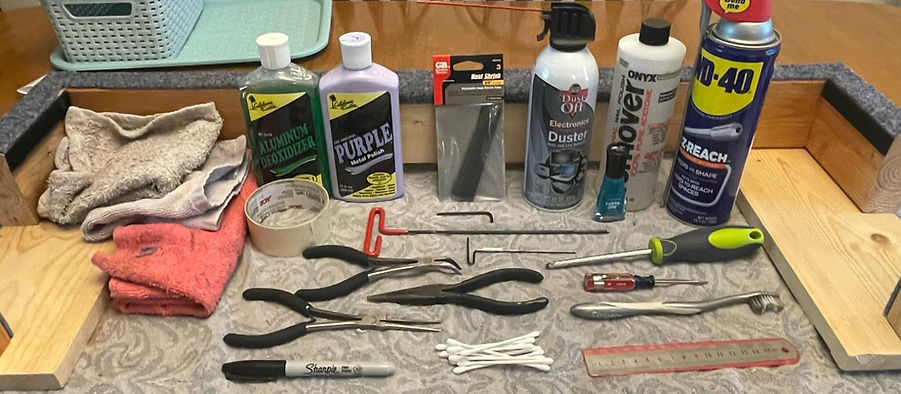
Above: Most of the supplies you’ll need can be seen here.
Document Your Setup with Photos and Videos
Throughout this entire process, take photos and videos. This is especially important at the start before you touch a single screw. Take multiple photos at multiple angles of the underside of the guitar. You want to have photos to reference for every single screw, collar, spring, etc. under your guitar. Take videos too. Go pedal-by-pedal and lever-by-lever and document with video how far the pedal or lever moves, what exactly moves under the guitar, and where it starts and stops (at the changer end as well as at the pedal stop bar or any other mechanical stops). When multiple rods are moving simultaneously, take note of the relative timing and travel of the movement of each rod both individually and with respect to the other. Make sure you document which holes are being used in your changer fingers for the pull rods that are connected. Leave no movement undocumented. This is your safety net for the entire project, so be diligent. It’s also the best first step anyone can take to truly understand how a push-pull guitar really works.

Above: Example photo of the pedal end of the guitar underside.

Above: Example photo of the changer end of the guitar underside.
Disconnect the Pull Rods
In this step you’ll be loosening the collars on your pull rods so that you can unhook the rods from the changer’s raise fingers and remove the rods. But before you loosen any of the set screws on your rod collars, you should mark on the pull rod where collars are located as accurately as possible. You can also measure the distance from the collar to the end of the pull rod and either write it down or just take a photo (see below). This will be very helpful when it comes time to reassemble the rods and put the collars back into the correct locations. I used fingernail polish because it can be easily removed with nail polish remover and a Q-tip and it works well, but you could mark the rod other ways too. In any case, the goal is to know where to place the collars during reassembly by marking the pull rod.

Above: A close-up of the nail polish marking the collars on the pull rods.
Above: A photo showing both the nail polish on the pull rod as well as a ruler measuring the distance between the rod collar and the end of the rod.
Once you’ve marked all the collars on your pull rods, document the results with photos (again). Now you’re ready to loosen the set screws using a 5/64″ hex wrench. Start with the 10th string (closest to you) and loosen the set screws in each collar on the pull rod connected to that string’s raise finger. With the pull rod moving freely, you can now disconnect the pull rod’s hook from the changer’s raise finger. You should now be able to remove the pull rod entirely.
Note: You might be able to get away with leaving some or all of the pull rods in the guitar if you have room to slide them far enough back away from the changer after loosening all the rod collars, but I think by leaving the rod in the guitar you’re likely to make later steps more difficult by hindering access to the push rods and return springs. This guide will assume you’ve removed all the pull rods.
Be sure to keep all your collars, springs, and spacers in order and put them back onto the pull rod for safe keeping. Now, use tape to label this pull rod so you know this came from string 10. You may also want to put some tape where the pull rod connects to the hook as I found these hooks tend to fall off after some handling (later in this guide, we’ll add heat shrink tubing where the hooks connect to the rods as an optional step, so you could go ahead and do that now instead of wrapping them with tape). With the 10th string pull rod removed, proceed in a similar fashion for the remaining pull rods. When you’re done, you should have all pull rods removed from the guitar and labeled. Obviously, not every string will have a pull rod, which is normal. Place the pull rods to the side and proceed to the next step.

Above: All pull rods removed and labeled with painter’s tape.
Remove the Double-Lower Return Spring on String 2
Use needle-nose pliers to remove the return spring that enables your double-lower on string 2. This spring is just like the other return springs situated closest to the body of the guitar, but it will be hooked up differently. It will be hooked to the raise finger on string 2 and activated by a knee lever. Removing this spring provides better access to the lowering rods and the other return springs in later steps.
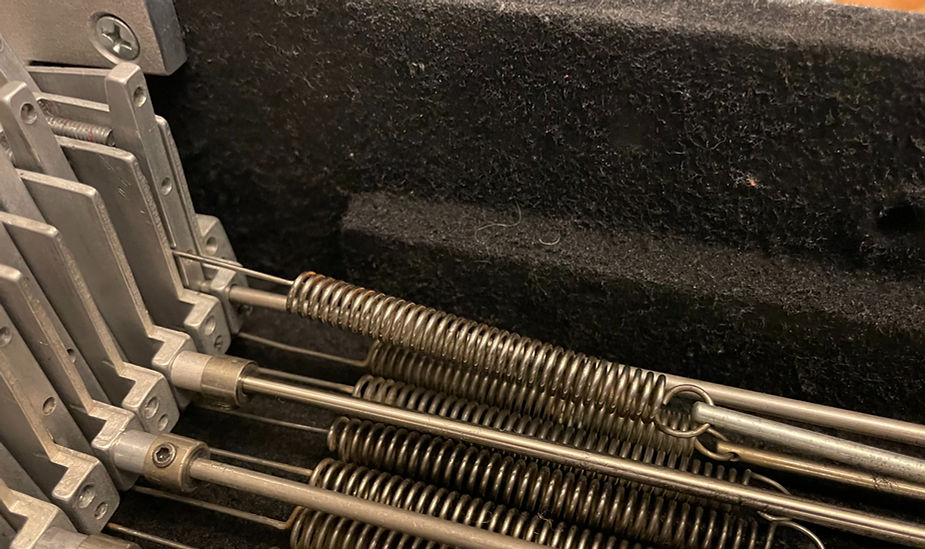
Above: The upper most spring seen above is the return spring we’re removing in this step.
Above: Use needle-nose pliers to remove the spring on string 2.
Disconnect the Push Rods
In this step you’ll loosen the collars on push rods and slide the rods back away from the changer, leaving them in the guitar. Before loosening any collars on the push rods, mark the locations of the collars just as you did on the pull rods for later reference.

Above: Each push rod has fingernail polish marking the location of each collar prior to loosening. Here you see the changer end. Notice, the sixth string push rod is marked in 4 locations, and the ninth string push rod has already been removed.
Above: The pedal end of the guitar can be a little tricky to reach when you’re marking the collar locations.
Some of the collars can be hard to reach, but if you’re using nail polish, the applicator should be able to reach those tight spots. If you make a mistake getting the rod marked accurately, just remove the nail polish with nail polish remover on a Q-tip and try again. Once marked, allow time for the nail polish to dry.
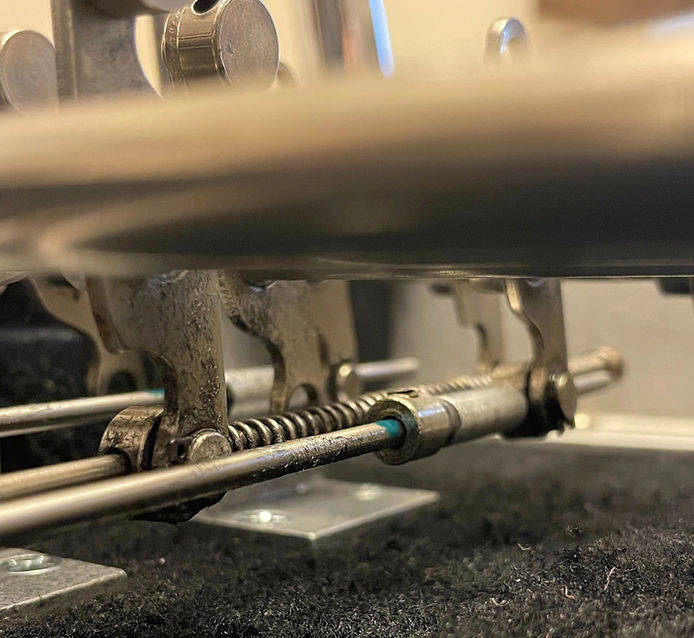
Before proceeding to loosening the rod collars, bear in mind that any rod collars that hold the aluminum bushings directly up against the lowering finger on the changer can remain in place and do not need to be loosened. The exception, of course, would be if you wanted to remove the push rod from your guitar entirely. In that case you would remove all the collars from the rod. For any of these rod collars you leave in place at the very end, put some painter’s tape around them to prevent the adjacent aluminum bushing from falling off.
Next, loosen each of the collars and slide the pull rod away from the changer. As with the push rods, start with the push rod closest to you and work them in order. For my setup, I started with 9th string and proceeded accordingly. Some, or possibly all, of your push rods may be difficult to remove from the guitar entirely and that should not be a problem. Just slide them back far enough from the changer so that you can access the return springs that are situated just below the push rods.
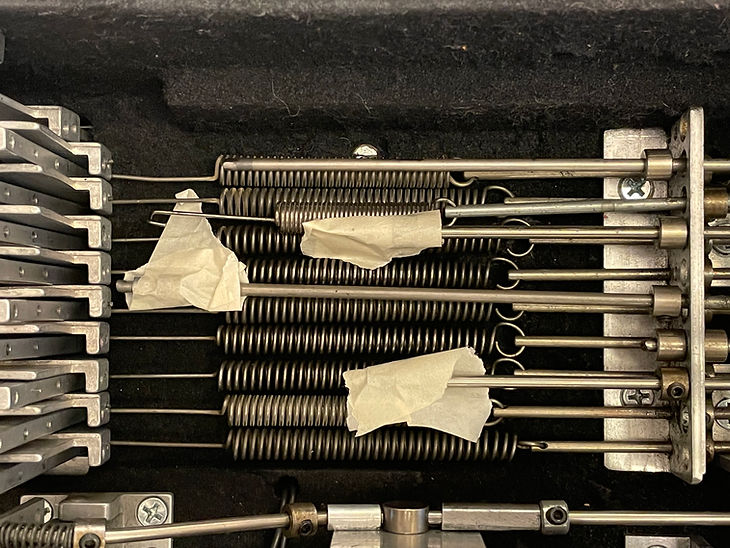
Above: The changer-end of the push rods do not have the collars loosened and each end is wrapped in painter’s tape to keep the aluminum bushings from falling off.
Remove the Guitar Strings
Now is a good time to remove the strings from the top of the guitar. This will let us unhook the return springs without fighting the string tension.
Disconnect the Return Springs
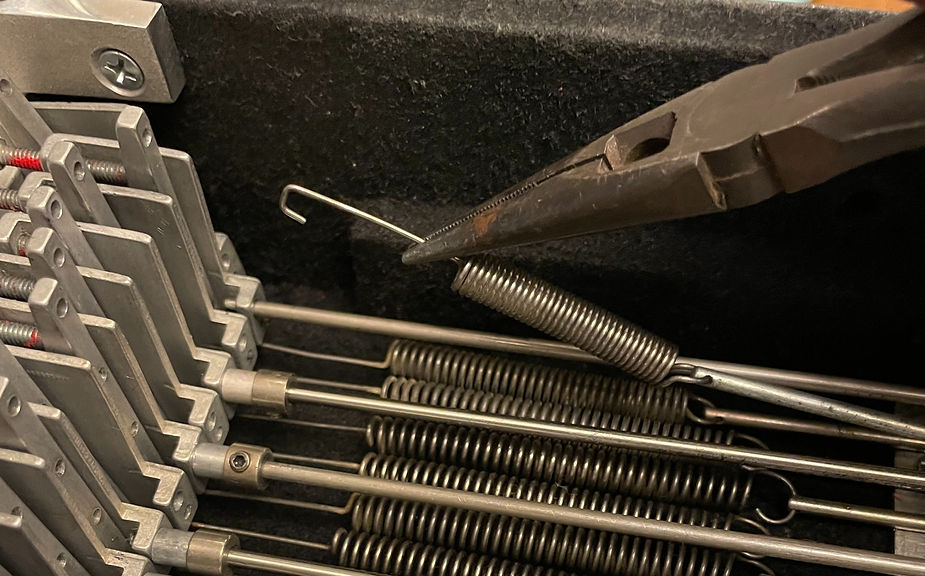
With all the rods either removed or out of the way, you can now access the return springs and unhook them from the lowering fingers using needle-nose pliers. Use the pliers to grab the straight part of the spring and pull it towards the changer just about an eighth of an inch or so. This should allow the hook to clear the hole it is in. Then lower your pliers down towards the body of the guitar to clear the spring hook from the changer finger. Let the unhooked return spring rest in the bottom of the guitar body.
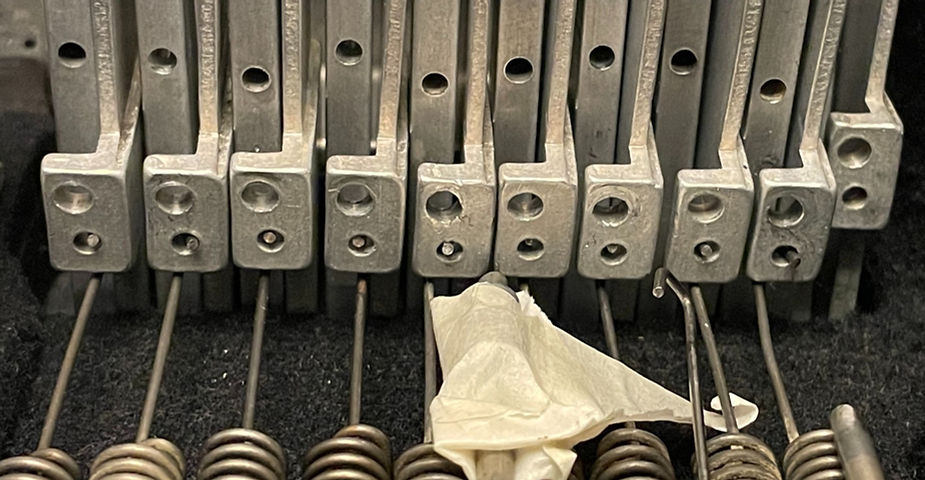
Above: Grab the straight portion of the return springs shown above to pull and unhook it. You can also see that there is enough space below the finger to remove the spring hook. Trying to remove the spring hook by sliding it between the fingers is needlessly difficult.
Remove the Changer Tuning Screws
At this point, all of the mechanical connections have effectively been decoupled from the changer. Next, remove the raise tuning screws from the raise fingers using a 7/64″ hex wrench. I suggest also removing the lowering tuning screws from the endplate so that they can be cleaned and serviced. If your lowering screws are in good shape, you can just back them out of the way of the lowering finger’s range of travel and leave them in the endplate.
Above: The tuning screws have been removed from the raise fingers. The lowering tuning screws have not been fully removed yet, but they have been backed out sufficiently to allow the lowering fingers a full range of motion.
Remove the Changer
My Emmons is a cut-tail, so this step will be slightly different if you have a wraparound or a bolt-on guitar. On the cut-tail, you will see two 7/64″ hex screws situated down inside the changer area. These two screws connect the endplate, through the guitar body, to the “tail” portion of the cut-tail changer. You will need a 7/64″ hex wrench with a longer shaft to access these.
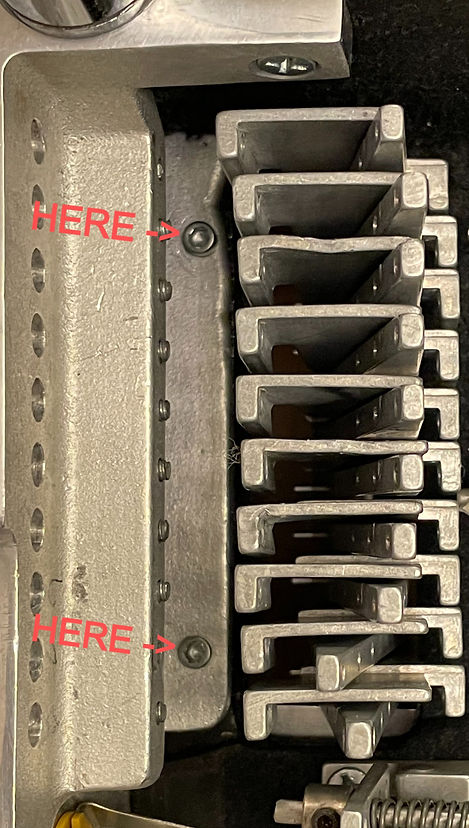
Above: The locations of two 7/64″ hex screws that must be removed can be seen.
Now we can remove the guitar from the workbench and set it upright so we can access the top side. Remove the four screws that are inside the pickup cavity securing the pickup. You do not need to remove the three flat head screws on the surface of the guitar neck surrounding the pickup. The pickup should now come free but be aware of the pickup’s wiring that will still be fixed to the guitar. Use a shop rag under the pickup to safely set the pickup aside on the neck. With the pickup out of the way, two large Phillips-head wood screws can now be seen securing the changer to the body of the guitar. Use a #2 Philips-head screwdriver to remove these screws.

Above: The pickup has been removed and set on a shop rag. You can see the four small flat head screws that secured the pickup still on the pickup. The two wood screws that secure the changer to the guitar body have also been removed.
The changer is now ready to be carefully removed from the guitar. Gently work the changer loose and pull it from the top of the guitar.
Disassemble the Changer
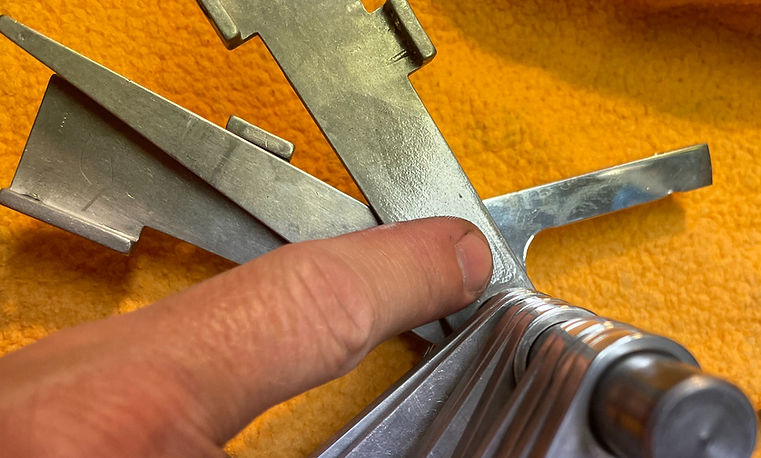
Once you’ve pulled the changer out, remove the four screws holding the cut-tail portion of the changer. This step will obviously be different if you have a bolt-on or a wraparound, but what we are doing is preparing to pull one or both pillow blocks off the axle. The pillow blocks are the large L-shaped ends of the changer that were screwed to the body. Get a firm grip on each pillow block and carefully but firmly twist and pull until one (or both) come off. Be careful to keep the spacers and fingers on the axle. If you have trouble getting any movement from the pillow blocks, try soaking the changer in Liquid Wrench Penetrating Oil overnight, or even several days, then try again.
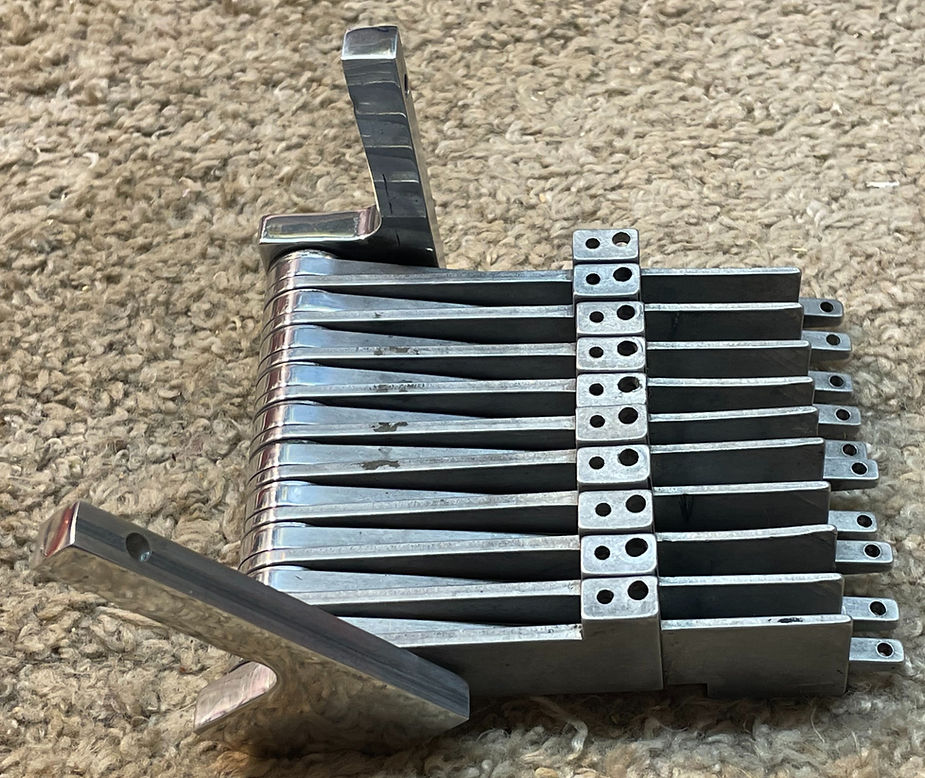
Above: The axle pillow blocks have been twisted about 45 degrees with respect to each other. Grabbing each one and carefully twisting will result in one the blocks moving and rotating free of the axle.
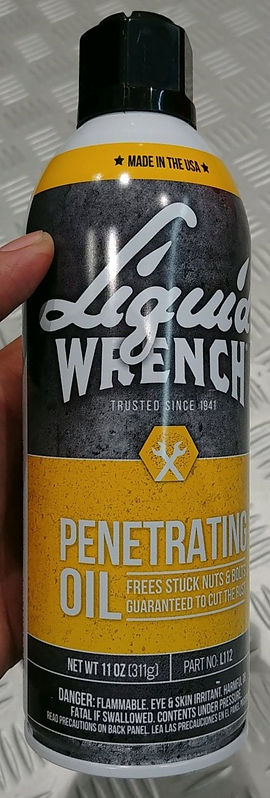
Above: Soak the changer in Liquid Wrench if your axle pillows will not come free.
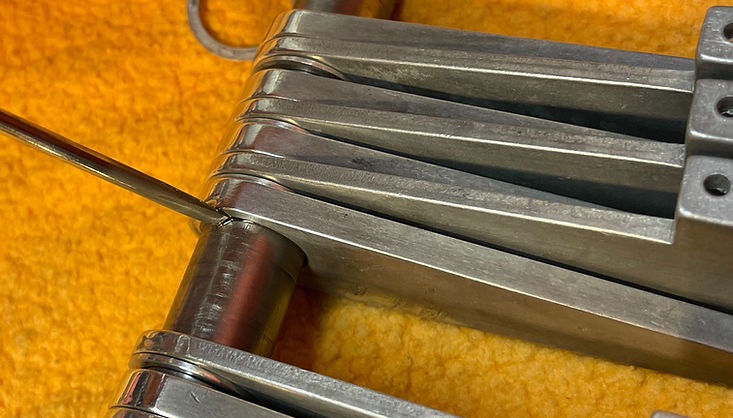
It’s important to keep the fingers and spacers in order during this entire process so that we reassemble the changer with each component in the same position on the axle. Slide the spacers and fingers off the axle and onto a nylon string that’s about two feet long. This will allow us to disassemble and work on each individual part while keeping them all in order. Once everything has been removed from the axle and placed on the string, slide a spare nut on the string and tie a good knot. The nut is there to make sure the spacers from each end of the axle don’t go full circle around the string and get right next to each other, causing possible confusion during reassembly.

Above: One end of the changer has been removed, and the individual spacers and fingers are going onto a nylon string, in order. A nut is on the string demarking the end of the changer.
Clean the Changer
With the parts secure on the string, use a plastic cleaning brush and a degreaser like Simple Green to remove as much gunk from the changer components as possible.
A WORD OF CAUTION: Test your degreaser on a small inconspicuous area of your aluminum parts before using it any further. Some degreasers are mildly corrosive and can damage the surface of aluminum parts. I made this mistake by using the wrong kind of degreaser and you can see the consequences in the next picture. I had to do extra work with steel wool and aluminum polish to properly restore the surface of the parts.

Above: The parts are looking pretty clean after using a degreaser. However, you can also see some slight splotchiness on the surface of a few of the parts, including the polished pillow block in the upper left corner due to the inadvertent use of a mildly corrosive degreaser.
When you’re finished using the degreaser, rinse the parts off thoroughly with water. To get a more thorough, deeper clean, soak the parts in Berryman Chem-Dip carburetor cleaner. I got good results after leaving the parts in for a couple of hours. You can leave the parts in overnight if needed.

Above: Berryman Chem-Dip carburetor cleaner comes with a basket that lets you drop your parts in and soak them.
After removing the parts from the Chem-Dip, rinse them off thoroughly with water again to remove any traces of the chemicals.
Prepare the Changer Parts for Reassembly
With all the changer parts fully clean, the next step is to make sure all contact surfaces smooth. In my case, I also wanted to polish the top side of my changer fingers to restore the shine. I will break this into two parts. If you don’t need to polish any parts, then skip step 1 below and proceed to step 2.
Step 1 – Polishing
Use an aluminum polish of your choice, though I highly recommend California Customs’ Aluminum Deoxidizer and Purple Metal Polish. Just follow the directions printed on the product. I polished the tops of my changer fingers as well as the outer edge of my spacers.
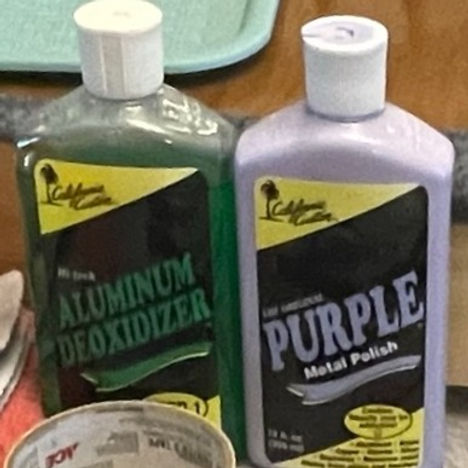
Above: California Customs Aluminum Deoxidizer and Purple Metal Polish work extremely well for polishing aluminum parts.
Above: You can see the results of using the California Customs polish on half the changer fingers.
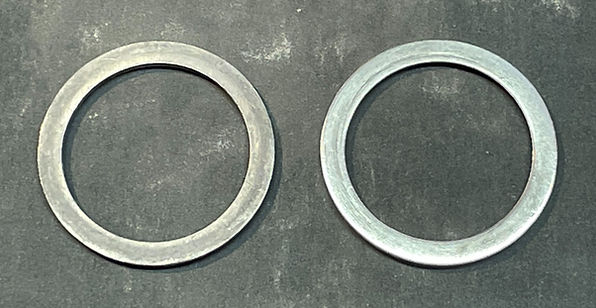
Above: I also used California Customs polish on the outer edge of the spacers. You can see the results of the polish on the right-most spacer above. This will give the assembled changer a nice, restored look.
Step 2 – Steel Wool and Sandpaper
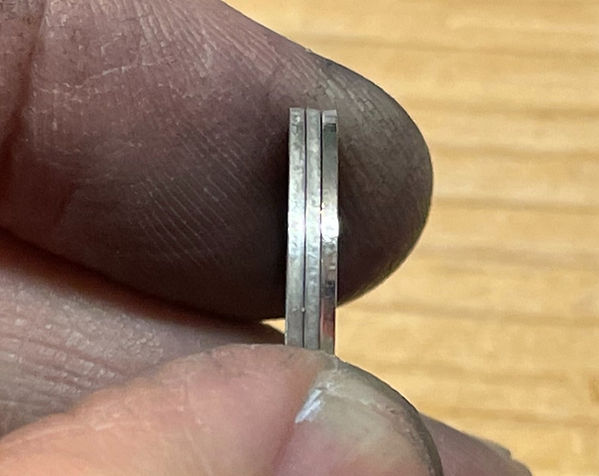
Use ??? grit sandpaper (or similar fine grit), and gently work the sides of each spacer in a circular motion flat against the sandpaper on a sturdy flat surface. You can also work each spacer through some 0000 steel wool by hand. Go fairly easy on this step. The goal is to knock down any small burrs or irregularities on the surface of the spacer, and you don’t want to overdo it and affect the overall thickness of the spacer which is critical for a properly functioning changer.
Above: It’s a little difficult to see, but the spacer on the right has been worked against the sandpaper and is smoother than the one on the left.
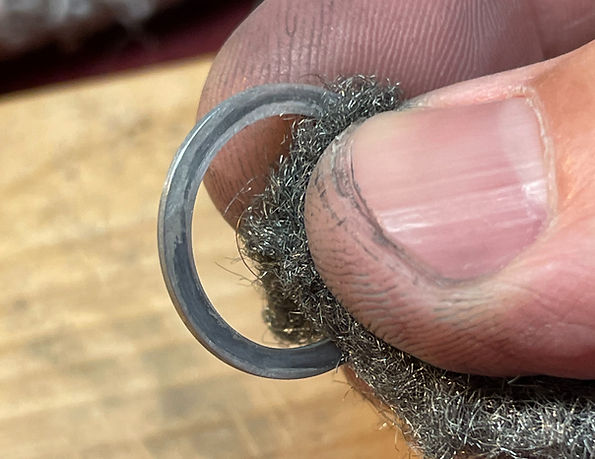
Above: Work each spacer through some 0000 steel wool to achieve a smooth contact surface.
Take each changer finger and work around the inner surface with 0000 steel wool where the finger makes contact with the changer axle.
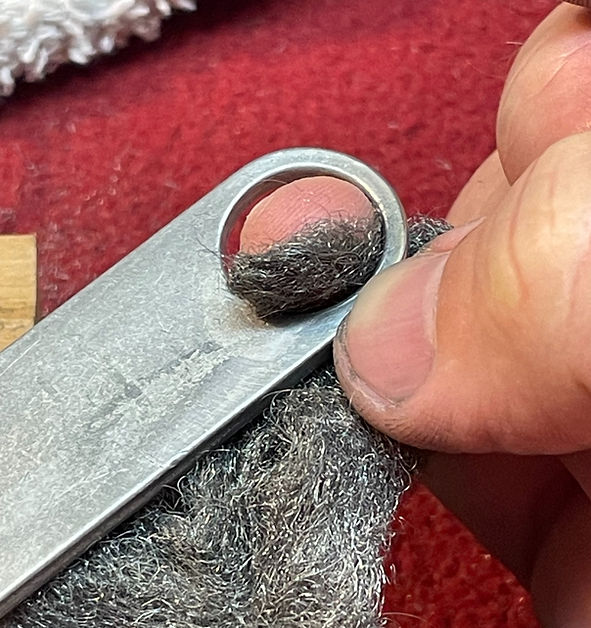
Above: Work the inner surface of the changer fixer with 0000 steel wool where it makes contact with the axle.
All of your changer parts should now be clean, and the contact surfaces should be nice and smooth. Before you begin to reassemble the changer, take a moment to rinse all of the parts thoroughly with water and allow them to dry completely. The steel wool will “shed” small metal fibers, so you want to ensure your parts are completely clean and free of these fibers before you proceed.
Begin Changer Reassembly
With all the parts cleaned and polished, you can begin reassembly. If you completely removed the axle from both pillow blocks previously, you will need to fully seat the axle into one of the pillow blocks at this time. The axle’s fit into the pillow block is pretty tight, so careful use of some force may be necessary.
Step 1 – Axle Assembly and Lubrication

Above: All of the changer parts are clean and polished.
Once you have the axle fully seated into one of the pillow blocks, proceed by lightly coating the axle with Valvoline Moly-Fortified Gray Grease. Use your finger to paint on a light thin coat all over the axle.
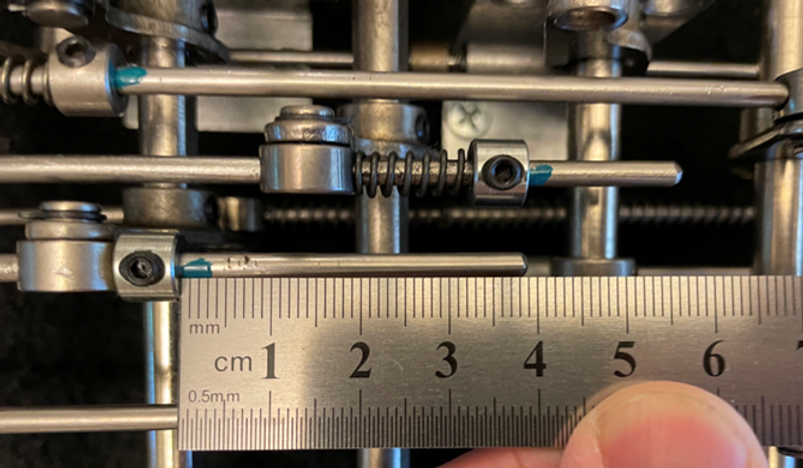
Next, begin sliding the spacers and changer fingers onto the axle in the same order that they originally came off. As you slide each finger on, lightly coat the sides of it with grease where it makes contact with an adjacent finger. Also, use a very small amount of Slick 50 Ceramic Engine Treatment oil on each changer finger where it contacts the axle as you slide it on. Use an extra small screwdriver and dip the tip of it in the oil, then just touch the end of the screwdriver to the point of contact between the changer finger and the axle (see picture below). This should be plenty of oil for the axle. Too much oil will end up being counterproductive and collect dust over time, negatively affecting the action of the changer. You will notice as you slide more components onto the axle, the grease will get wiped off more and more towards the end of the axle that is exposed. For that reason, reapply grease to the axle as needed to maintain a light coating during the reassembly process.
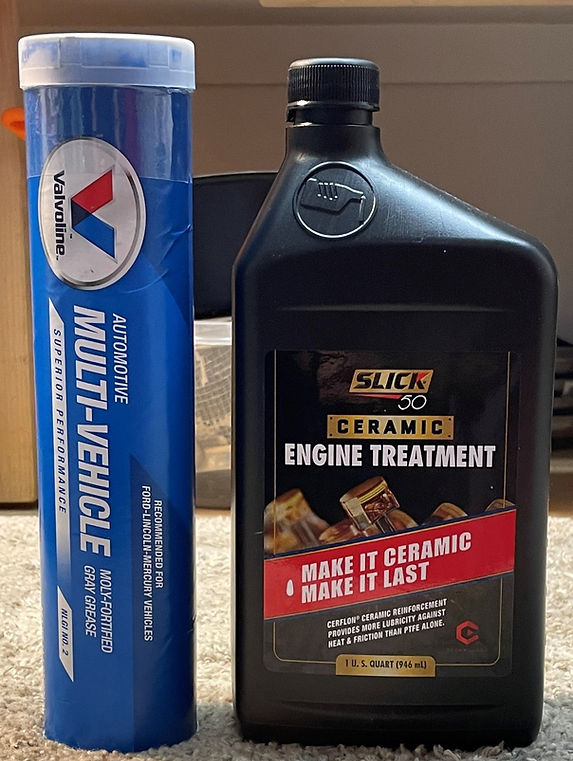
Above: Valvoline Moly-Fortified Gray Grease and Slick 50 Ceramic Engine Treatment are used to lubricate the axle during reassembly.

Above: A light coat of grease has been applied to the axle.
Above: A light amount of grease is applied to each side of the fingers where contact occurs.
Above: A small screwdriver is used to apply a light drop of oil to each finger as it slides onto the axle.

Above: During reassembly, grease can be reapplied to the axle as needed.
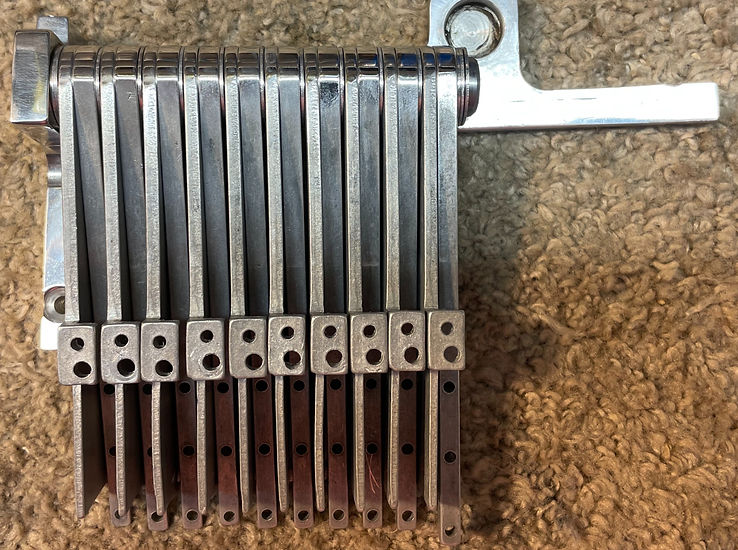
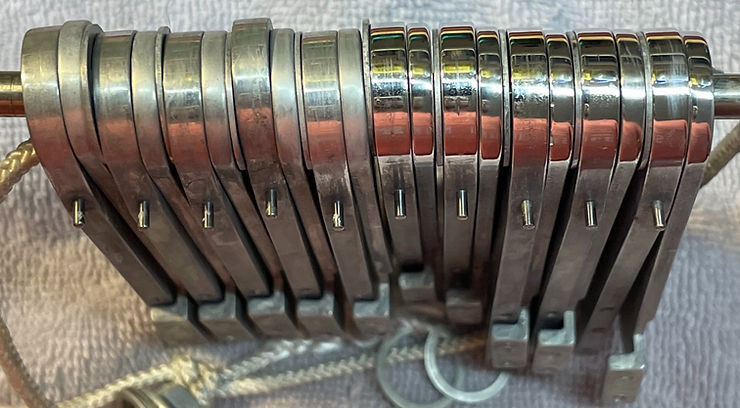
Above: The spacers and fingers have all been placed on the axle.
Once all the changer fingers and spacers have been put back onto the axle, the second pillow block needs to be firmly seated onto the exposed axle end. This requires some force, but you must be careful not to overdo it and damage or bend any parts. Use a pair of work gloves to protect your hands from the corners of the pillow blocks. Work the end onto the axle as far as possible by hand. This will take some effort and you’ll likely need to use a twisting motion to work it onto the axle.
If extra force is needed to seat the axle, you can use a rubber mallet very carefully. It will be important to protect both pillow blocks with shop rags and place the changer on a 2×4 so that the surface the changer is resting on is relatively soft (see photo below). Start with very light taps and work up slowly with just the minimal force necessary to seat the axle into the pillow block properly.
Get the axles lined up as perfectly even with each other as possible. We will fine tune the alignment in the next step.
Once you’ve got it reassembled, the changer fingers should move freely, but they should not be too loose. Side-to-side motion should be very minimal, but rotation of parts around the axle should be smooth.

Above: Exercise caution if you use a rubber mallet. Notice shop rags cover both ends of the changer. The changer is also sitting on a 2×4 that isn’t visible (hidden by the shop rag).

Above: Both pillow blocks have been secured to the axle and aligned as closely as possible by hand.
Step 2 – Precise Alignment of Pillow Blocks
It’s important to have both pillow blocks of the changer seat perfectly flush against the body of the guitar when we attach it. Any unevenness between the two blocks will cause the geometry of the changer to be off and will cause problems. Think of the four corners of the pillow blocks like a table. We’re all familiar with tables that have uneven legs that wobble. You want to avoid the “wobbly table” effect with the pillow blocks.
Start with a small piece of wood, a 2×4 for example. Place the changer on top of the wood with the pillow blocks making full contact with the wood’s surface (see picture below). Chances are, you’ll have at least some minimal amount of “wobble” that you can detect between your pillow blocks. Press down firmly along the “arms” of the pillow block to make both of them completely flush against the wood. The goal is to achieve a small amount of rotation of the pillow block on the axle to bring the blocks into alignment. We can use a good amount of force here (by hand) because the wood is much softer than the aluminum.
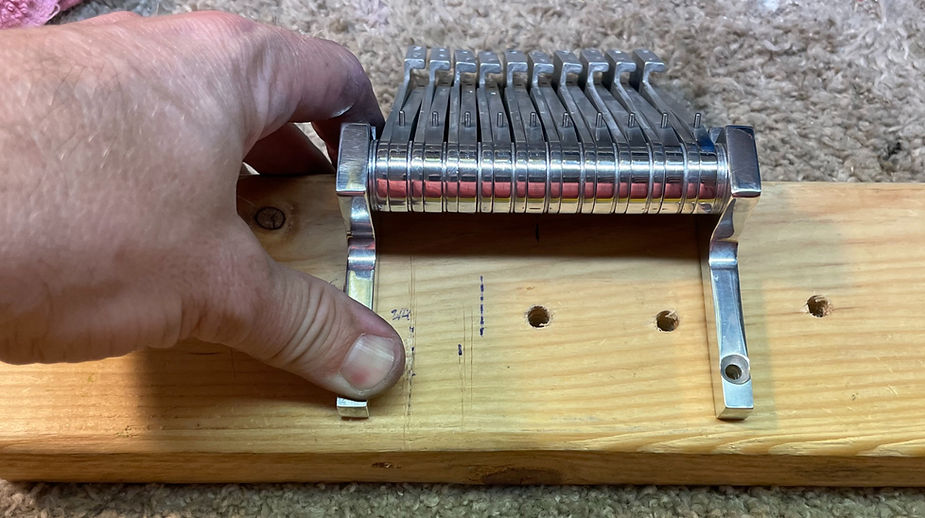
Above: Press both pillow blocks down against a piece of wood by hand to get them level.
Once you’re satisfied with the leveling of the pillow blocks against the 2×4, use a level to achieve the last bit of fine adjustment to the pillow blocks. Your 2×4 may not be perfectly level, so this last step is an extra measure to get the blocks as flat as possible. Be careful because, unlike the wood, the metal surface of the level will be harder than your aluminum pillow blocks. Extra care needs to be taken when applying force and leveling the pillow blocks against a metal surface.
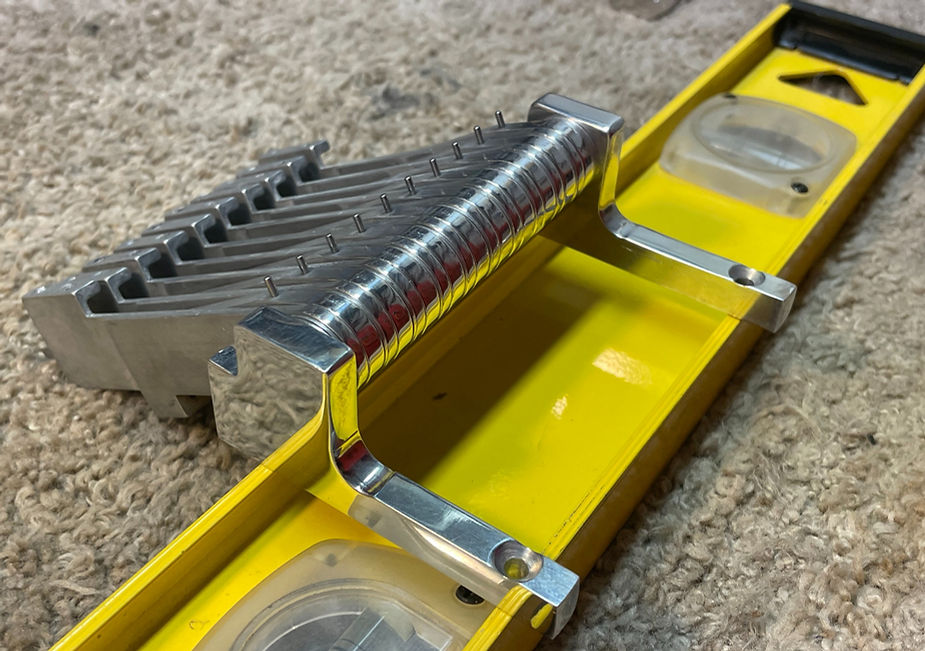
Above: Fine tuning the level of the pillow blocks.
Putting the Changer Back into the Guitar
… to be continued. Check back soon! I should have the guide completed in a few days.